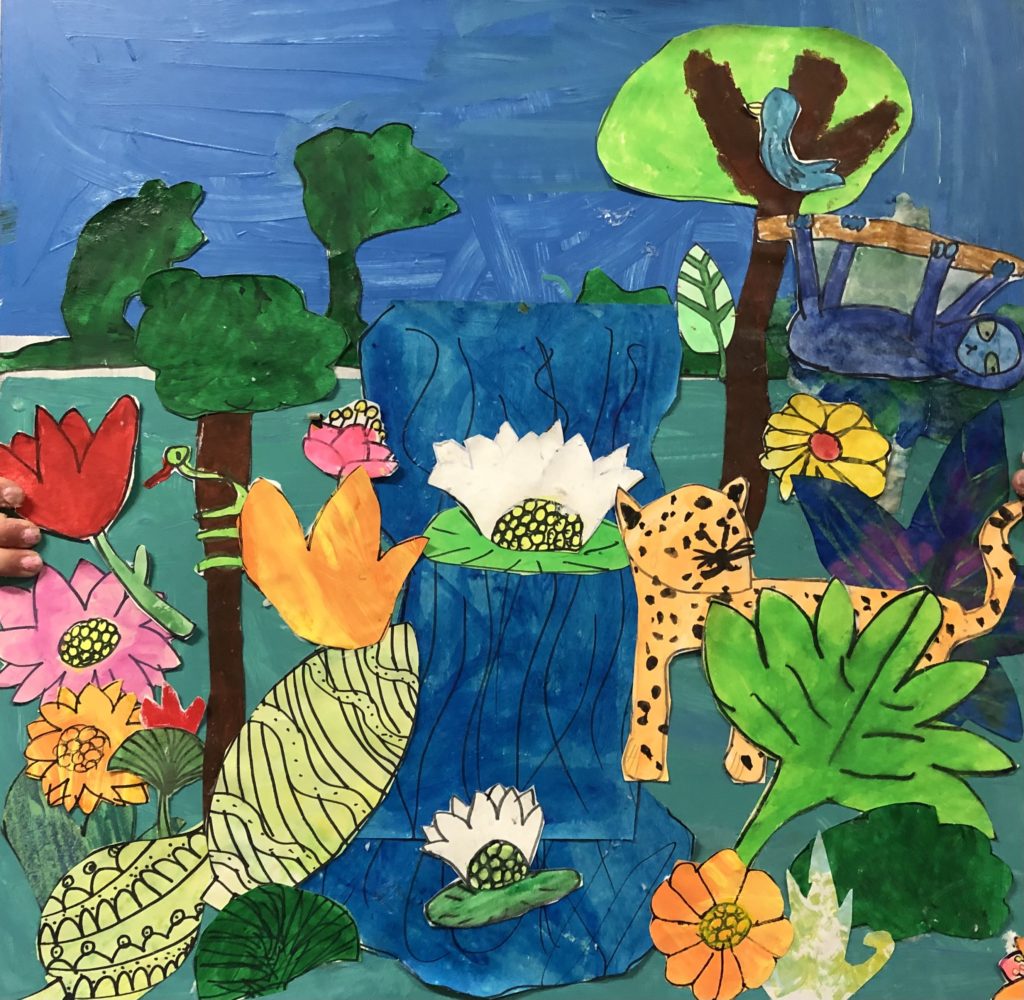
During COVID, Junior Apprentices (ages 8-12) created this wild jungle collage project by working diligently on one large canvas for 6-weeks. Artists gathered inspiration from the lush vegetation and vibrant colors of a rainforest, and worked diligently on one large canvas for 6-weeks. The challenge of this art project was to focus on one layer or area of the rainforest to depict: The forest floor, understory, canopy, or emergent layer. The canopy has many interesting plants and animals, and most of my students chose to put their focus. My finished example is below, although it’s important to note that I did not begin the project with an example. We looked at photographs for inspiration and worked together to create our collage materials.

12 HOURS | Intermediate/Advanced | Ages 9+
Materials needed:
Hardboard or Foam Core
A variety of papers and collage material: cardstock, hand-painted papers, handmade papers, tissue and printed deli papers
Watercolors
Acrylic paint
Matte medium
Yes! Paste
Scissors
Reference picture of subject matter
The substrate used for the project was a 24″x24″ piece of hardboard. When collaging a variety of materials onto any substrate (background), it’s important to use a material that resists warping. After applying three coats of gesso to our boards were were ready to paint the background. We used acrylic paints in a variety of blues, greens, and white to cover the boards. Then be began planning and sketching out ideas on paper.


Turning our attention to the plants and animals that live in the canopy of a rainforest, we drew animals on white cardstock. Artists were given handouts and several photo references to assist them with drawing from observation. One particularly helpful reference was the book, “Draw Really Cool Stuff” by Douglas C. DuBosque; published by Hinkler Books. Drawings were first practiced in sketchbooks. The animals were drawn, then traced with Sharpie Markers, then painted and colored before being cut out. (Helpful for those children who are fearful of painting outside the lines. )
Next, we talked about perspective. Creating perspective using the concept of here, near, and far in the foreground, middle ground and background, will be more difficult for younger artists. The easiest way to understand how perspective works is to remember what is closest to the viewer will be bigger. Similarly, far-away things should be smaller. In other words, in our jungle compositions, the plants or animals that were farther away in the background needed to appear smaller than those in the foreground, or front of the canvas, which is the part closest to the viewer.
I do not teach this age group with directed drawings because I believe that their own personal mark-making and intuitive ways of illustrating things will eventually help them develop their own style. For this age group (8-12yrs), I think it’s important to encourage what they do, and put more emphasis on the practice of really seeing their reference image or object. Good artists are great at noticing details, contours, and values in what they are trying to render. The more young artists practice working like that, the more skilled they will become.
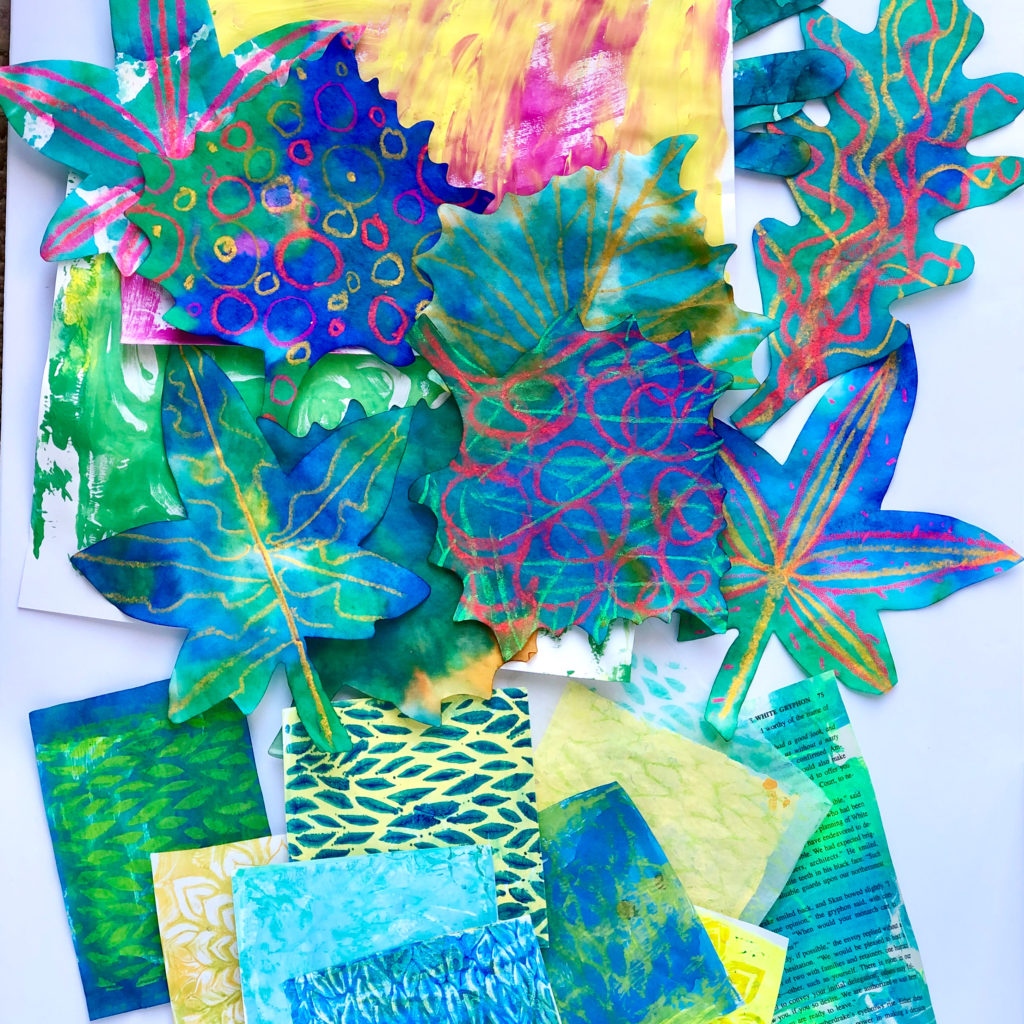
1) The first part of this project is all about printmaking and painting papers to be used for collage. Knowing the subject matter will make your color and material choices easy.
2) Once animals and plants are drawn on cardstock or prepared papers, they can be cut out and set aside. Make sure to vary the sizes of animals and plants to create perspective in your composition.
3) Once the hardboard with the painted background is completely dry, begin playing with your cutouts, it’s time to decide where everything will go. I encouraged my students to take their time exploring their layout options, move pieces around, and play with the composition. By swapping different cutouts before permanently committing with glue adhesives, artists can see different options and decide which layout is best.
4) Last stage: Applying the glue. Begin with the landscape, and add animals later by layering them in behind plants or other animals. Layering adds visual interest to your piece, and is an important technique that collage artists use all the time. Don’t glue anything down until you are satisfied with your layout. Use a strong adhesive. Make sure to pay special attention when applying glue to the edges and corners. Paper curling occurs when glue is applied only to the center of a paper piece, and results in poor craftsmanship. Taking the extra time needed to be sure to glue your pieces down properly will make all the difference in the finished piece.

Collage artist and painter, Elizabeth St. Hilaire, is a contemporary artist whose work I have admired for years. She has in-depth videos on her blog at www.paperpaintings.com about her collage process, and which adhesives are best to use, and when. For my students, I chose Liquitex Matte Gel Medium and YES! Paste. Gel Medium is made from 100% acrylic polymer emulsion, and forms a durable film when dry. Gel mediums are used by professional painters to extend the life of heavy-body paint, to create impasto, relief, sculptural or a variety of other unique painting effects. YES! Paste is an all purpose stick-flat glue that has a stronger bond that school glue. Both can be purchased at dickblick.com (best price) or amazon.com .
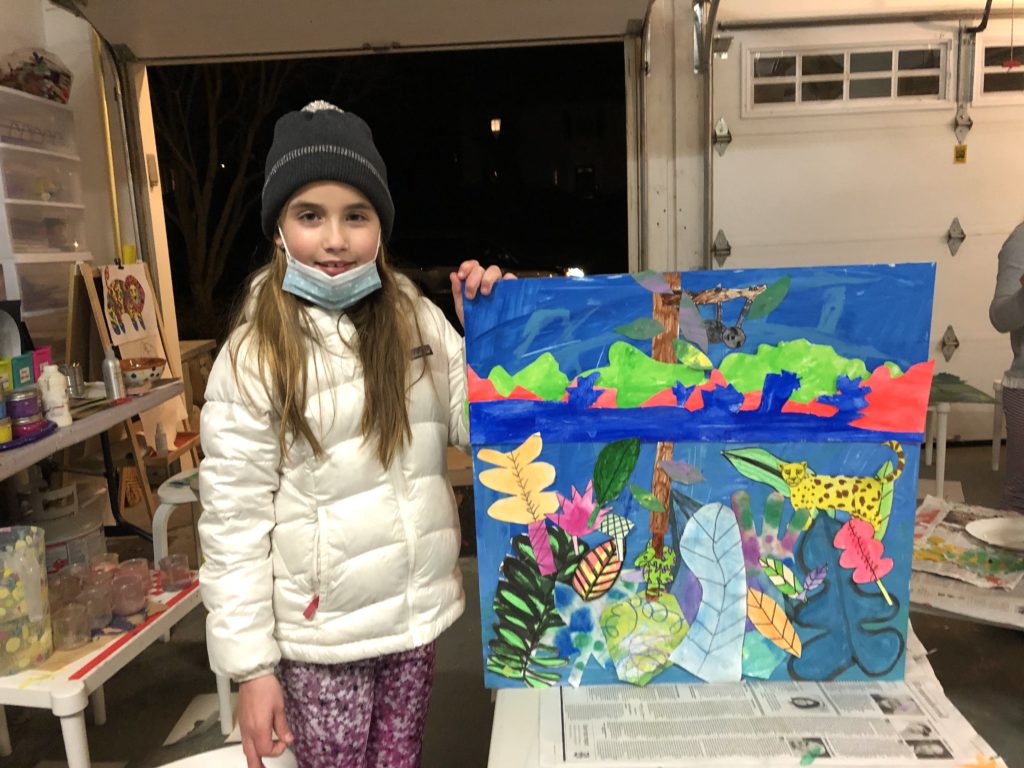
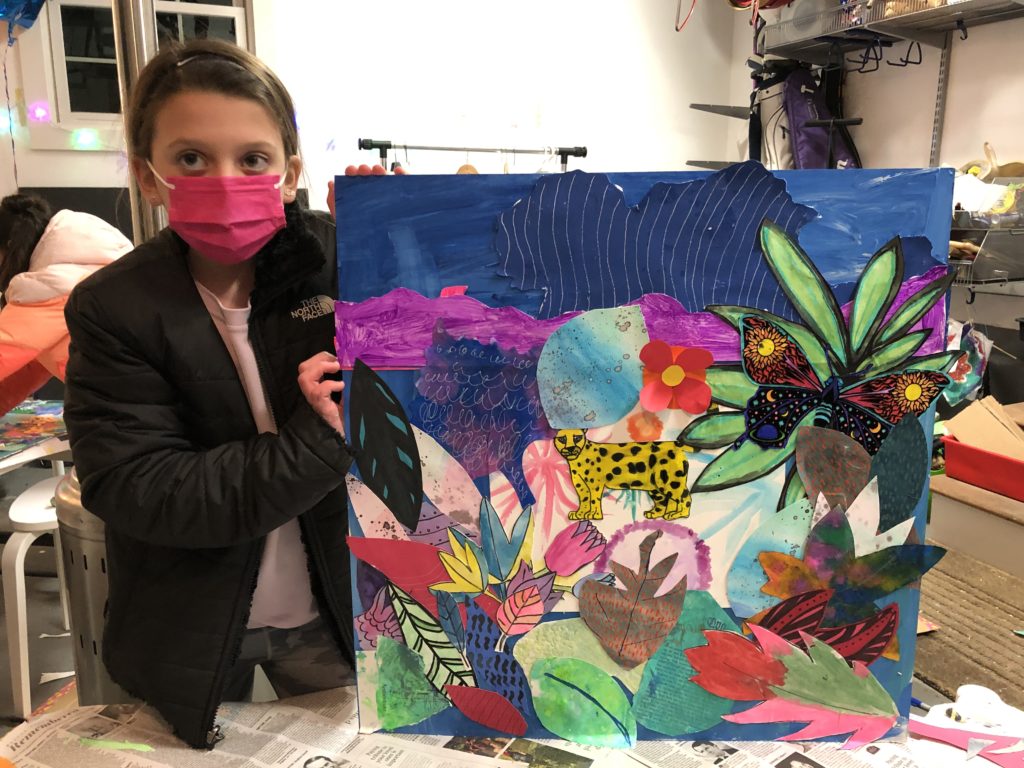
There you have it! Large format jungle collages were the result of this process. Please let me know if you have any questions. If you decide to make something similar, please tag me on Instagram @arthouselab or Facebook. I’d love to see what you create!
